Accessibility by people with visual impairments and other disabilities is built into Digital Fife.
Features such as screenreader compatibility, user control of font size and contrast, the facility to read aloud pages and automatic translation ensure Digital Fife websites can be used by all.
Digital Fife websites consistently score highly on internationally recognised accessibility tests.
Documents can be uploaded to your website's Library and then added to pages using hyperlinks in text, buttons or list 'widgets'.
Before you upload a document
In most cases, information that is intended to be read online is better presented as web content rather than uploaded as a Word document or PDF.
Web pages are generally easier to read on different devices, easier to navigate and more accessible, particularly for people using screen readers or other assistive technology. They are also easier to update without having to upload and replace files.
This can include meeting minutes, policies, reports and other information that is sometimes provided as a separate document.
Only upload a document when there is a good reason for the information to remain as a separate file.
Name and describe your files
Give your file a clear, descriptive name before uploading it to the Library. This will make it much easier to find and manage later.
Although you can add categories to group files, the Library is always organised alphabetically by filename. You can also search the Library by filename or description, so adding meaningful information to both will make files easier to find.
For documents with a date, put the date at the beginning of the filename using the format YYYY-MM-DD.
For example:
2026-07-15-committee-minutes.pdf
If the exact day isn't relevant, you can use the year and month:
2026-07-newsletter.pdf
When uploading the file, add a clear description. The description can be more natural and detailed than the filename.
For example:
Filename: 2026-07-15-committee-minutes.pdf Description: Committee meeting minutes - 15 July 2026
Good practice when naming files:
use a short, descriptive filename
put dates at the beginning where relevant
use lower-case letters
use hyphens instead of spaces
avoid special characters
add a useful description
use a consistent naming system across your Library
2. Scroll to the control panel at the bottom of any page and click on library.
The library can be accessed via the control panel at the bottom of the screen when an editor is logged in.
3. Click Get new file.
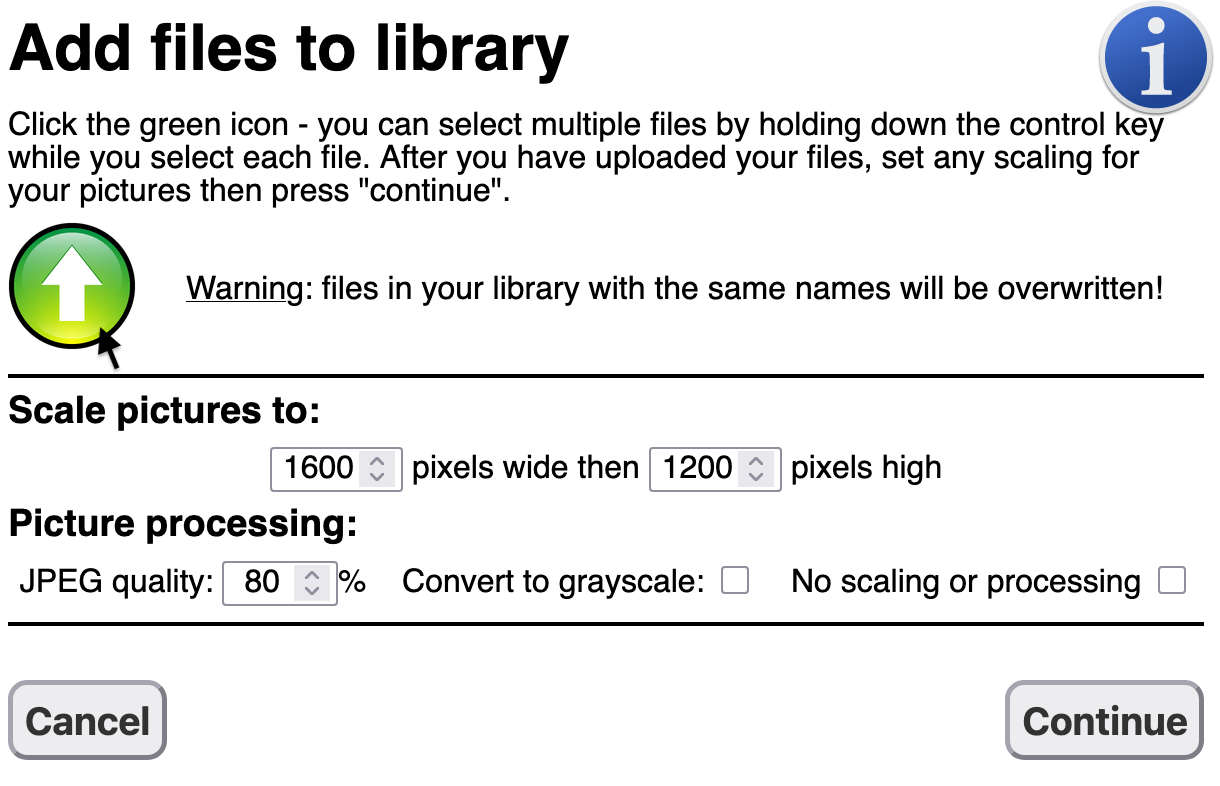
4. Click the green arrow icon to upload files and select the document from your computer.
Clicking the green button lets you select one or more files to upload to your computer. These are then listed with green ticks after they have been uploaded successfully. Clicking 'Continue' takes you to the next screen, where descriptions can be added.
5. Click Continue.
6. Add a clear description of the document.
7. Click Continue again.
You should now be able to see your file in the library. If you cannot see it, try refreshing your browser before any further troubleshooting. If you have lots of files in your library you can use the search function to filter by file name or description.
Add a document to a page using a hyperlink
Once the document has been uploaded to your Library, you can create a link to it from any text widget.
1. Find your document
Go to the Library and find the document you want to add to your page.
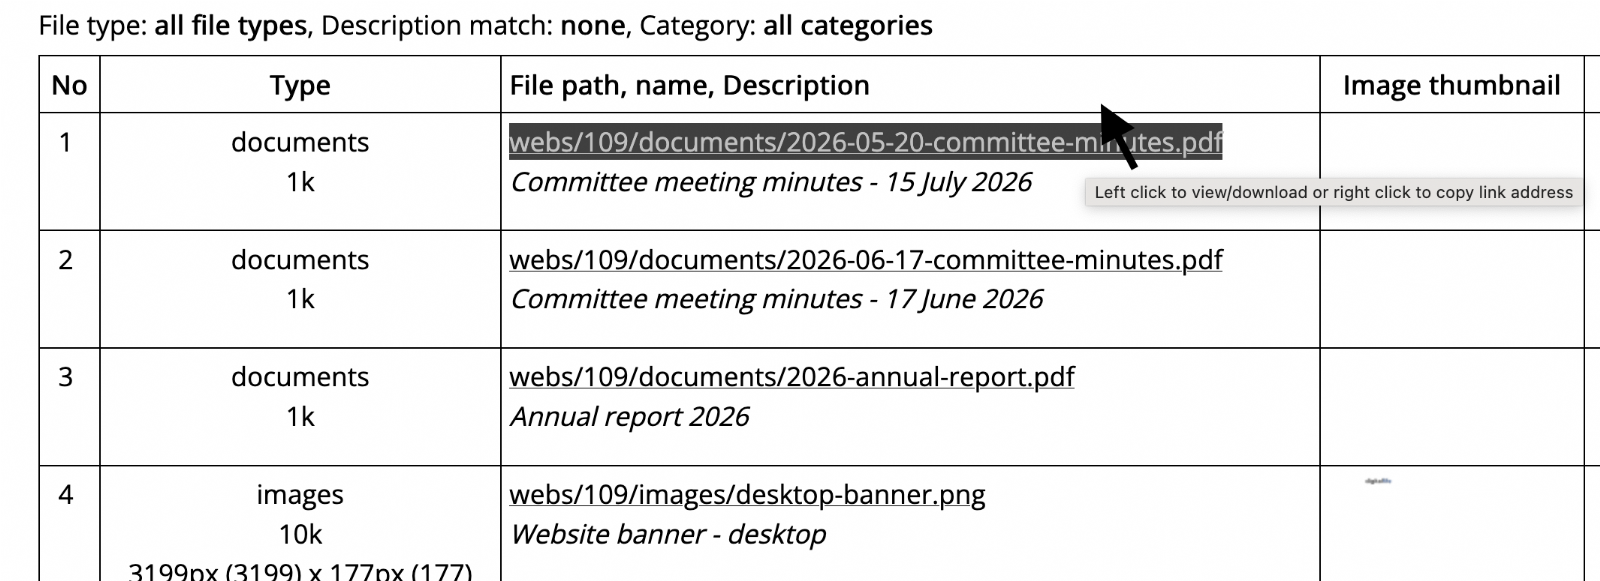
Right click on the document's web address and select Copy Link.
Right click the file path and select 'copy link'
2. Open your text widget
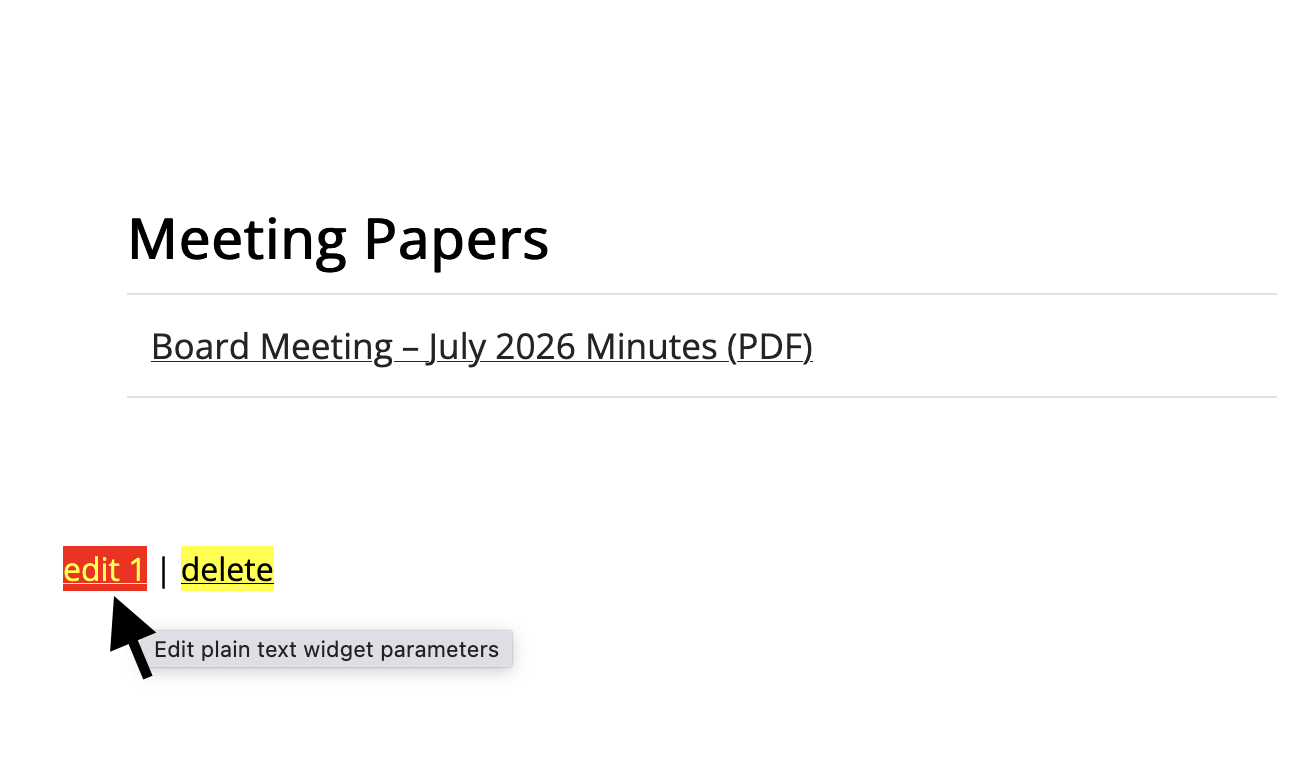
Go to the page where you want the document link to appear, make sure you are in editing mode and open the text widget for editing.
When in editor mode, you can edit each individual 'widget' by clicking on the 'edit' button directly below it.
3. Type the link text
First, type the words that you want visitors to click.
For example:
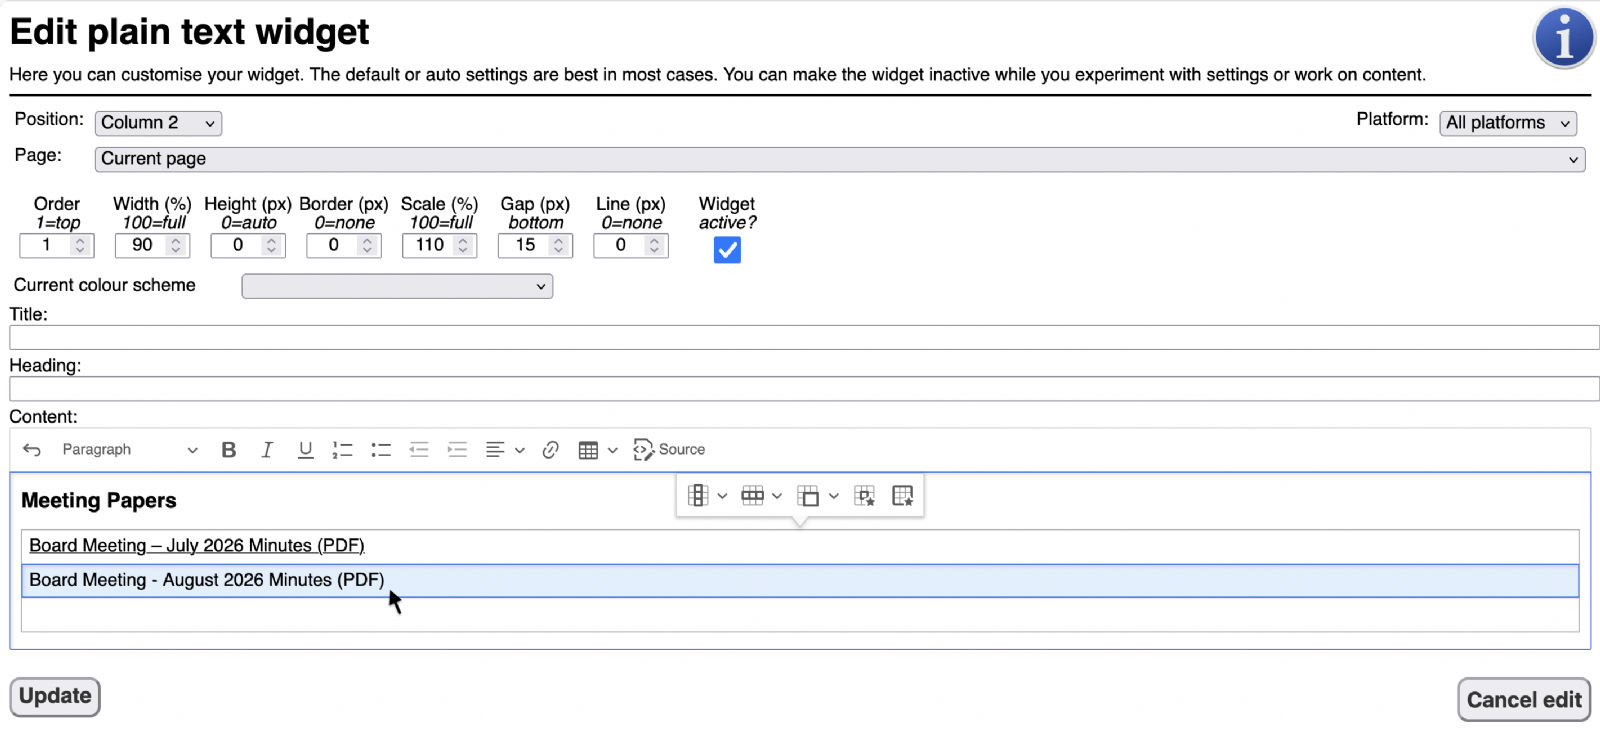
Board Meeting - August 2026 Minutes (PDF)
Type your link text first. In this example the text is in a table so you will need to add another row to the table before typing your text.
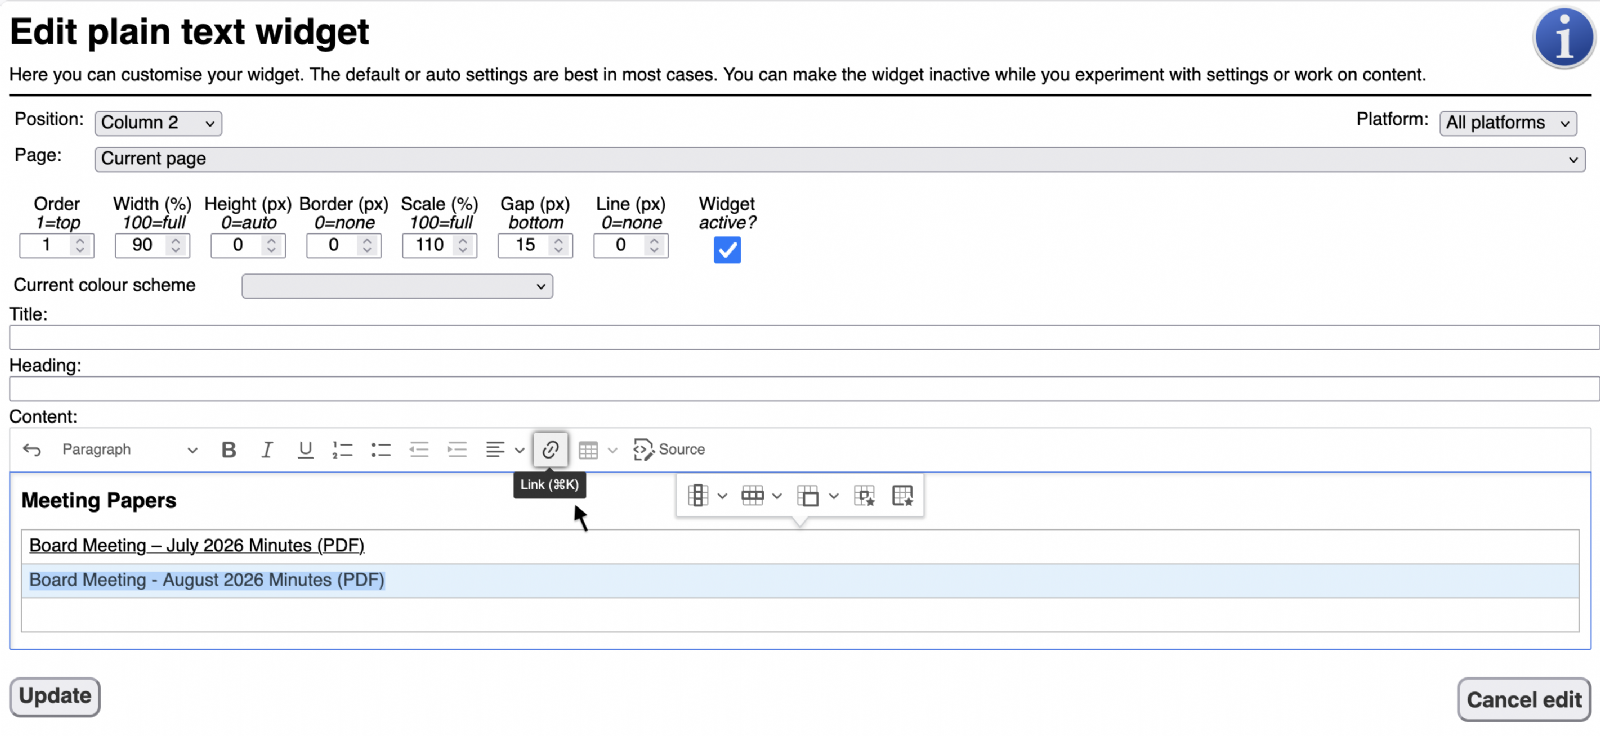
4. Highlight the text
Use your mouse to highlight the words you have just typed.
Then click the hyperlink button in the text editor toolbar.
The hyperlink button is located next to the text formatting tools.
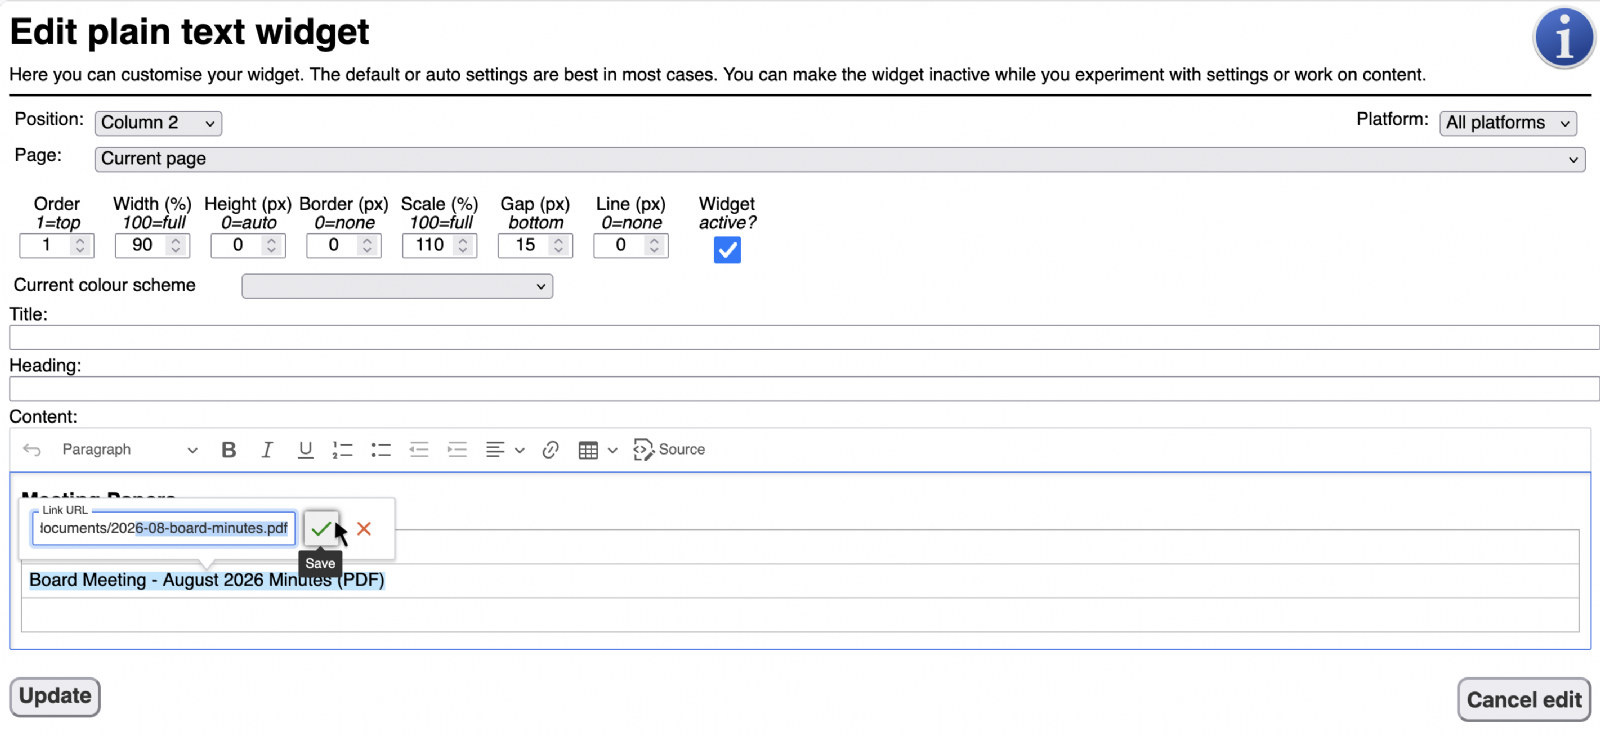
5. Add the document link
Paste the document URL you copied from the Library into the hyperlink box.
Click the green tick or press Return to add the hyperlink.
6. Update and check your link
Click Update to update the text widget.
Once you've finished, click the link to check that it opens the correct document.
Other ways to add documents
Documents can also be added to pages using buttons or list widgets.
Need More Help?
If you need assistance, please contact the Digital Fife team for support.